MODIFYING YOUR BSA GUIDELINE – UNITS
Health data can be measured in different units, i.e. lab data in mg/dl or mol/l, etc. Many formulas, however, hold only if the correct unit is supplied. In this chapter you can learn how to verify the input’s unit and how to define the output’s unit and precision.
1. Import the zip file containing the archetypes if not already imported.
- If the Editor is not already running, start the GDL2 Editor using either docker or Java as described in the GDL2 editor primer tutorial.
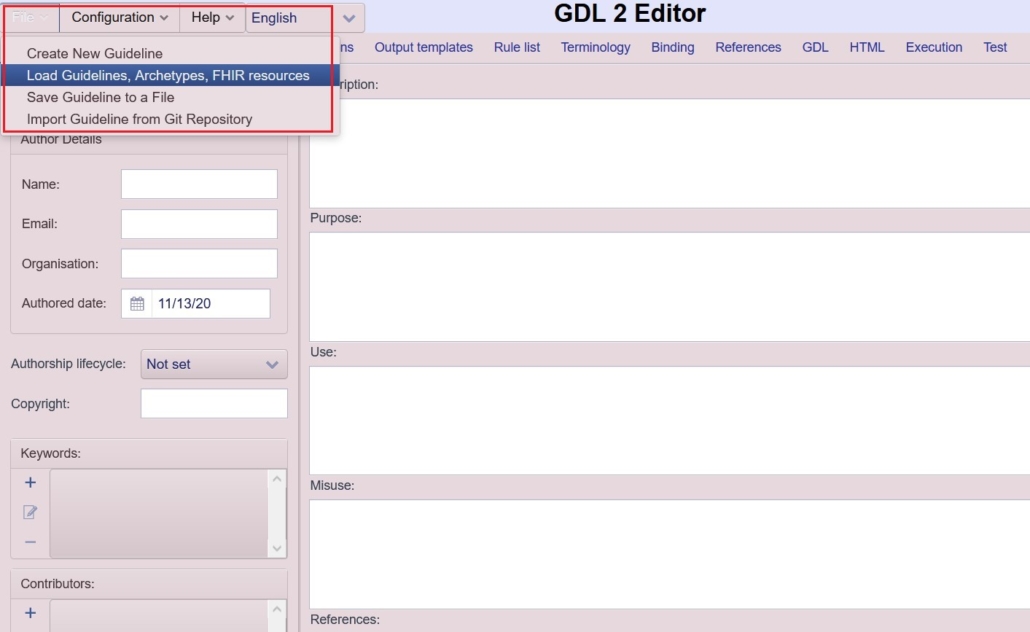
- If your Editor is already running click on the File > Load Guidelines, Archetypes, FHIR resources menu item (see screenshot).
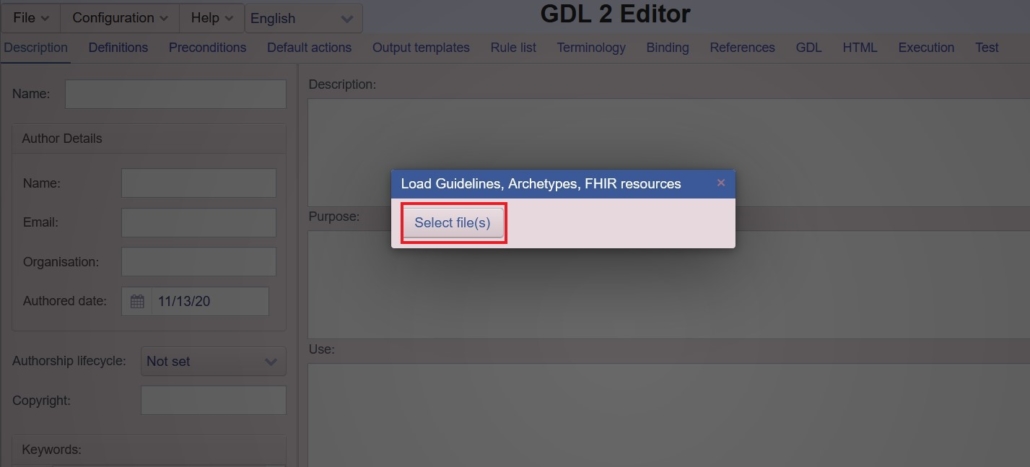
- Click on the Select file(s) button in the dialog box.
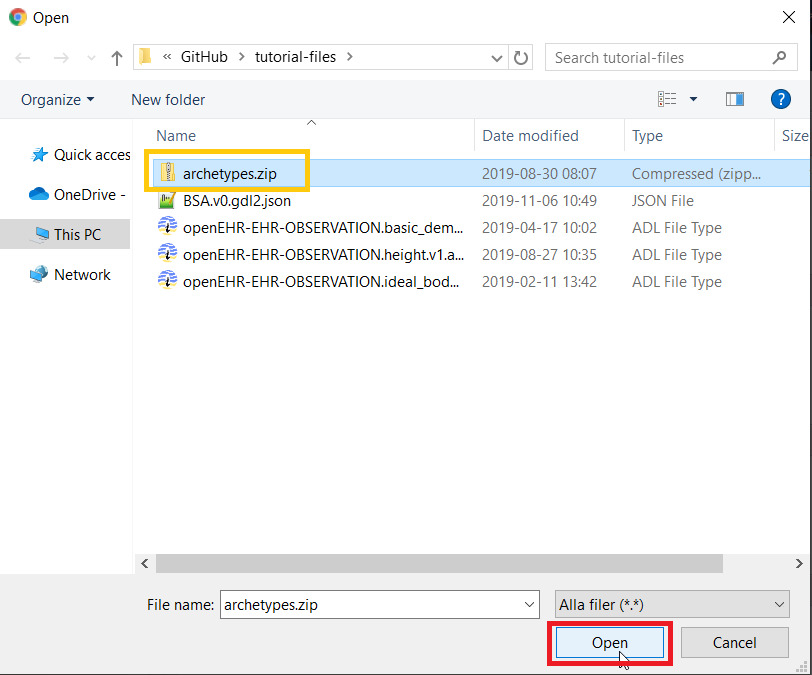
- Choose the zip file you have created and click on the Open button in your OS language.
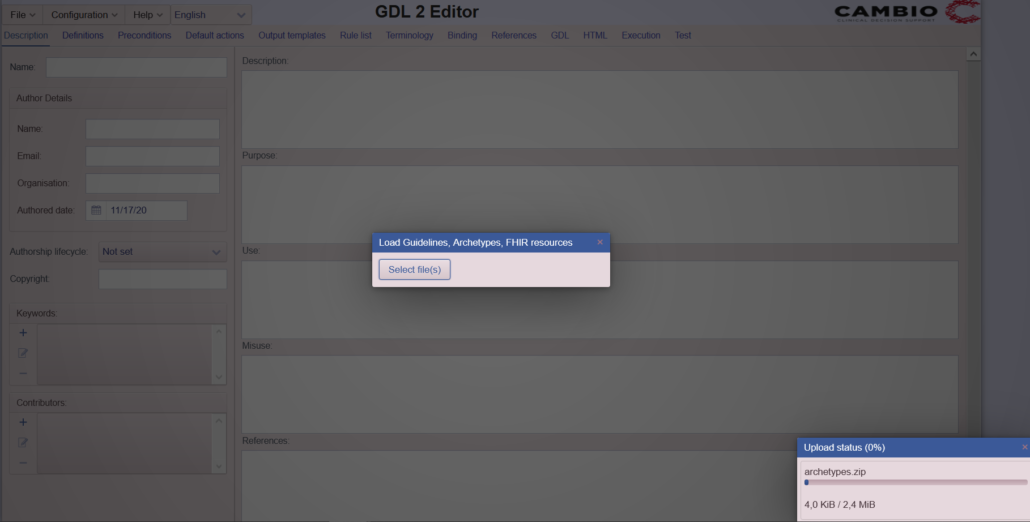
- This will load all the archetypes inside the zip file. While the archetypes are loading you will see the following screen. When this screen disappears you can continue to use the Editor.
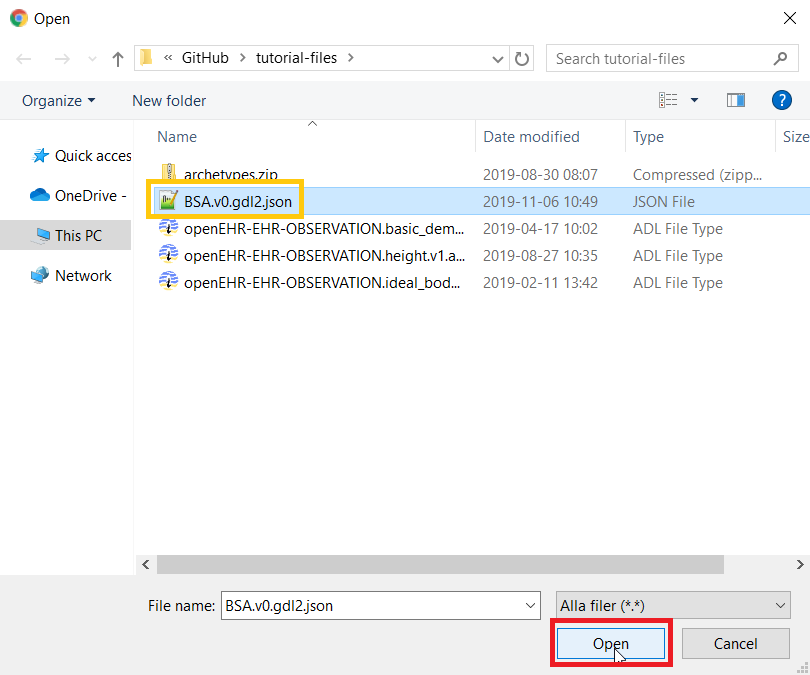
2. Open the previously created BSA guideline if it is not already open.
- To load a guideline, click again on File > Load Guidelines, Archetypes, FHIR resources from a File menu item.
- Click on the Select file(s) button in the dialog box.
- If you wish to open an existing guideline, the Editor will show a file selection window. To choose the file to upload navigate to the directory it is (if needed, presumably it is already there), choose the file by clicking on it. Choose BSA.v0.gdl.json, the one we created in the previous tutorial. After selecting your file, click on the checkmark to confirm your selection.
- After opening the guideline the Editor will show its content. Since we were in the Description tab you will see the Description of BSA, if you were in another tab before loading the guideline, you will see the content of that tab.
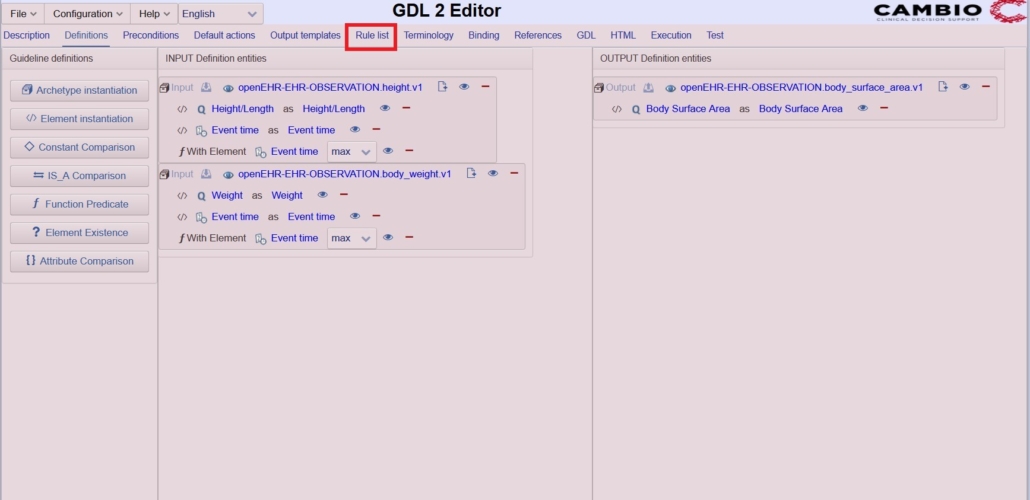
3. Open the Rule list tab
- Click on the Rule list label in the second row of the editor.
- This will show the rule you have created when making the BSA guideline.
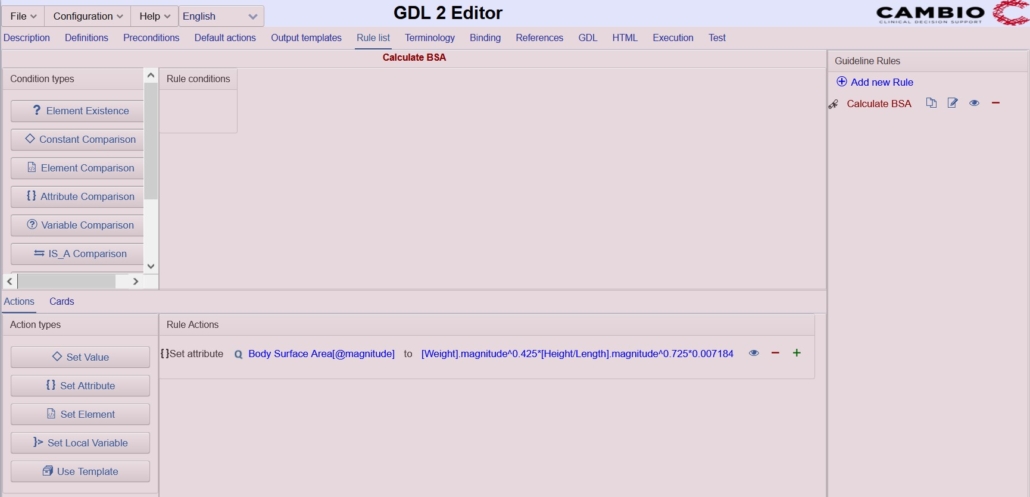
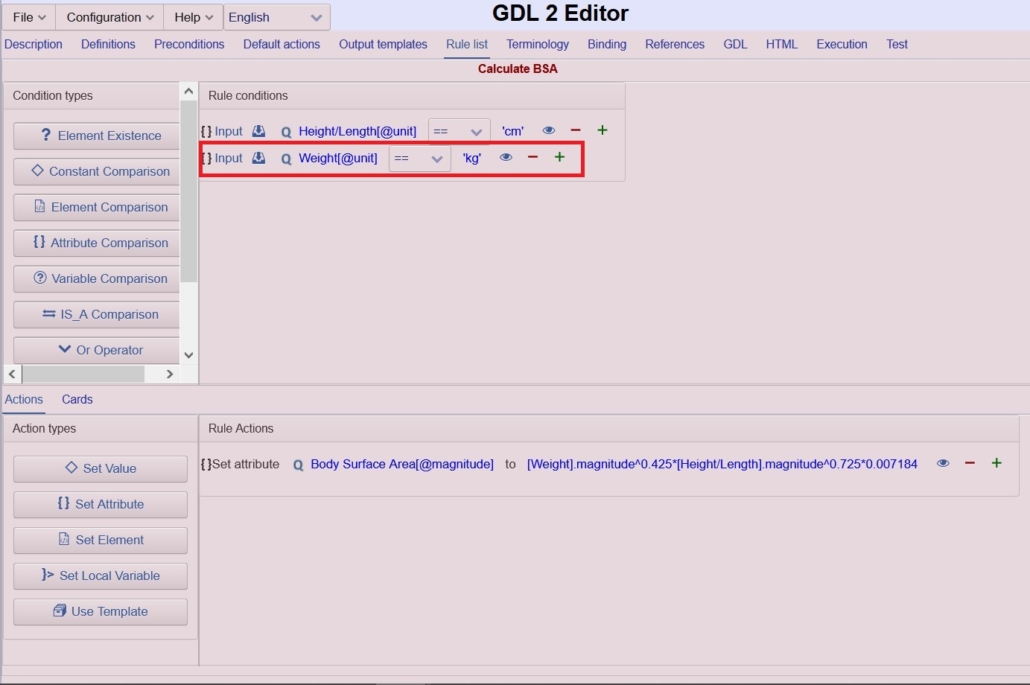
4. Create the conditions that only kg is accepted as the unit for weight and cm as the unit for height.
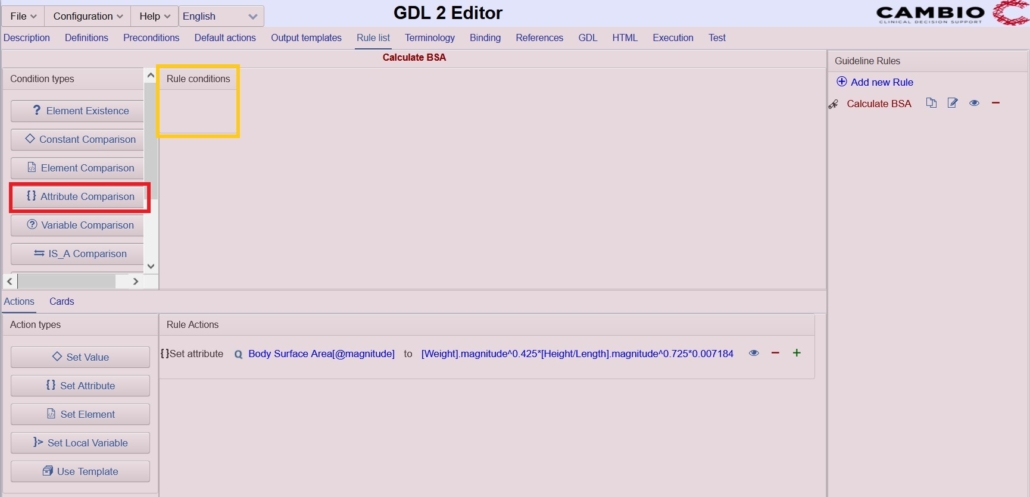
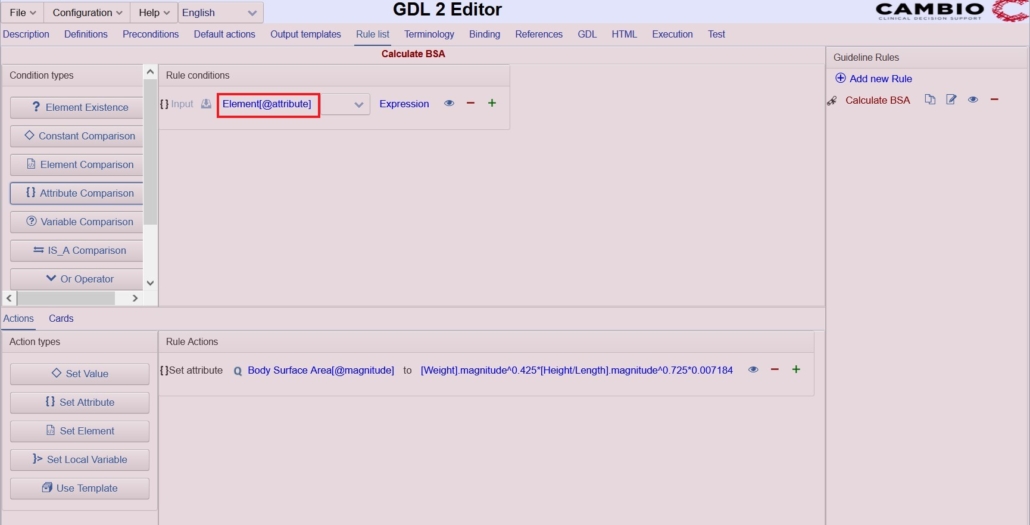
- The first step is to create an empty condition by dragging the Attribute comparison button to the Rule conditions field.
- This will show a new row (the empty condition) in this field. To continue click on the Element@attribute label.
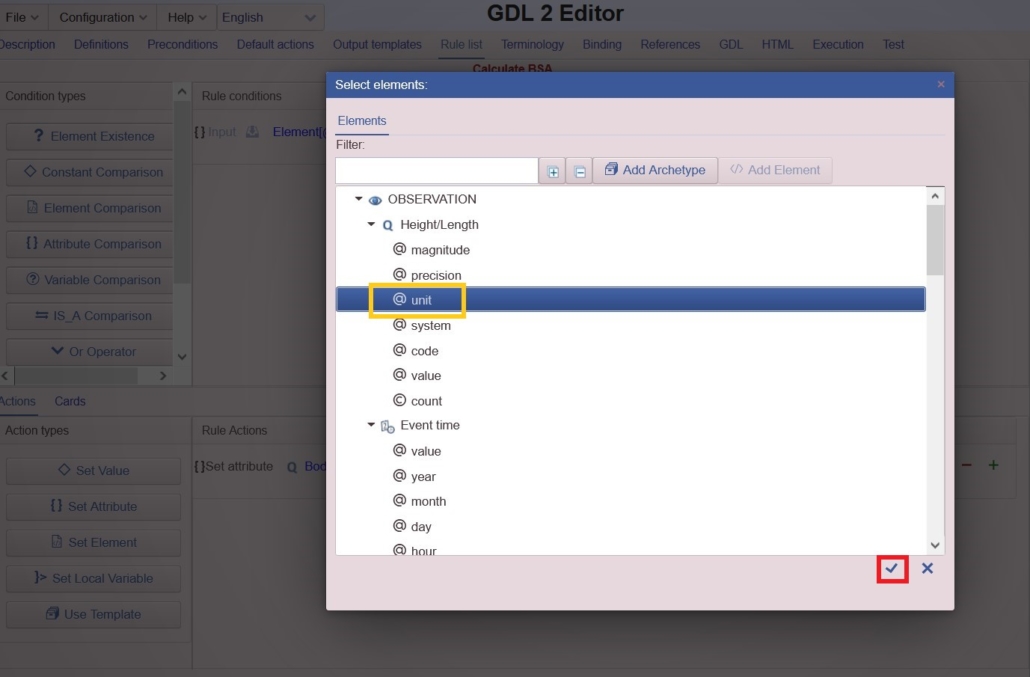
- This will show you a dialog box to select an attribute to compare. To select the unit of height select the @unit element in this dialog box below Height/Length and click on the checkmark to confirm your selection.
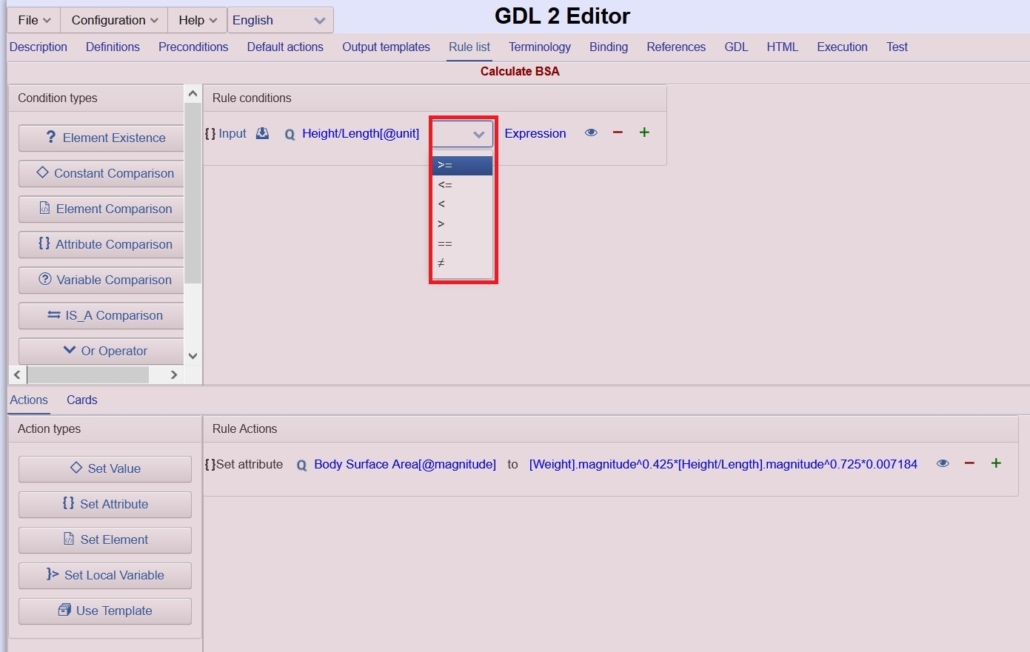
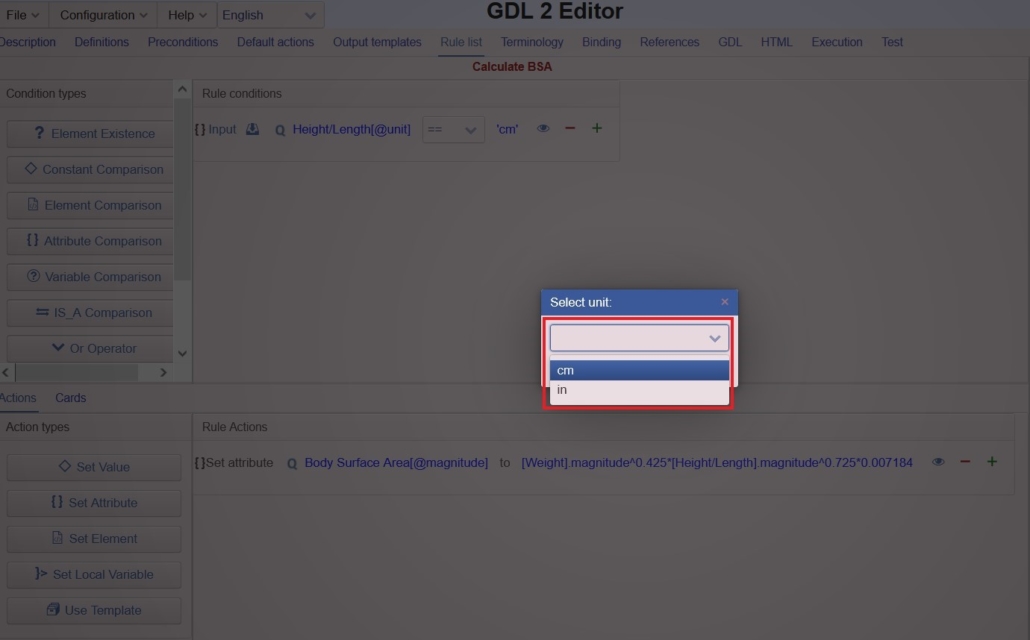
- The dialog box will disappear, and now you will see the unit of Height/Length in the new condition. Since you want the unit to be equal to cm select the == operator from the drop-down list in the row.
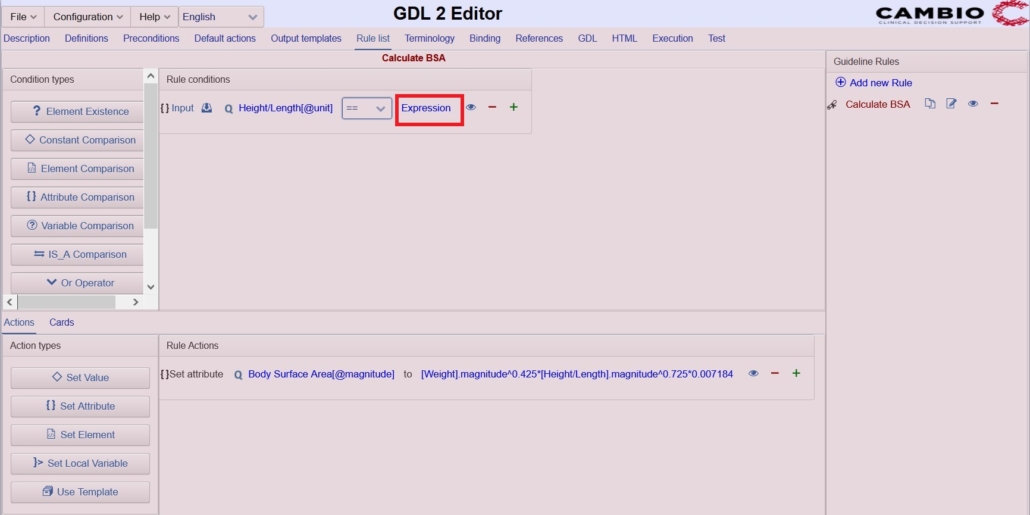
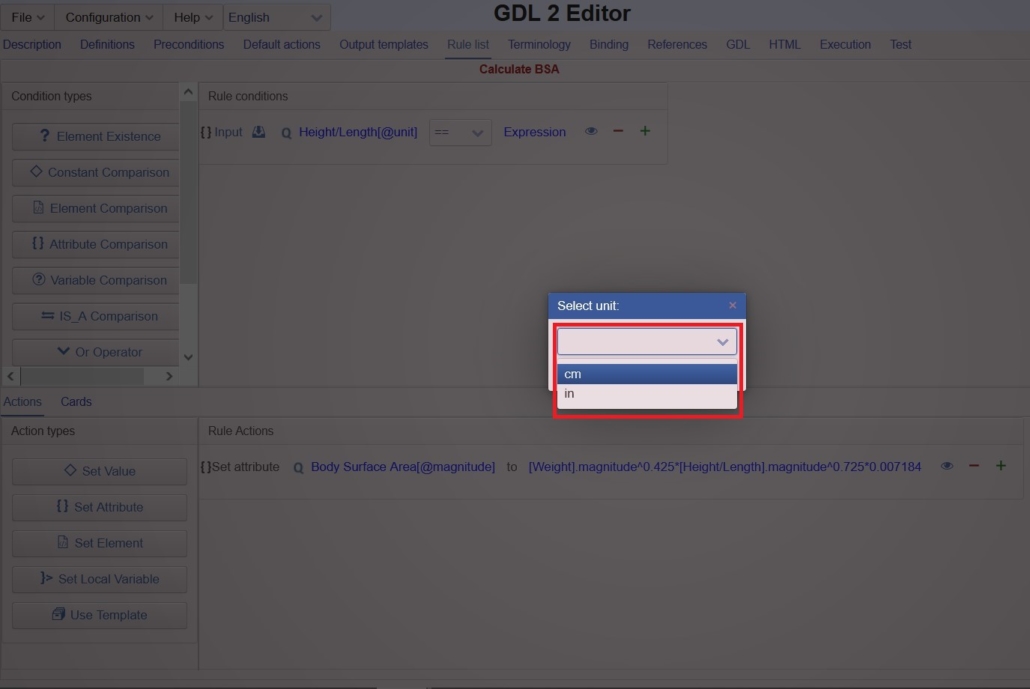
- Click on the Expression label in the row.
- Choose the required unit in the drop-down list. Here we chose cm as the required unit.
- To finalize your selection click on the checkmark in the dialog box.
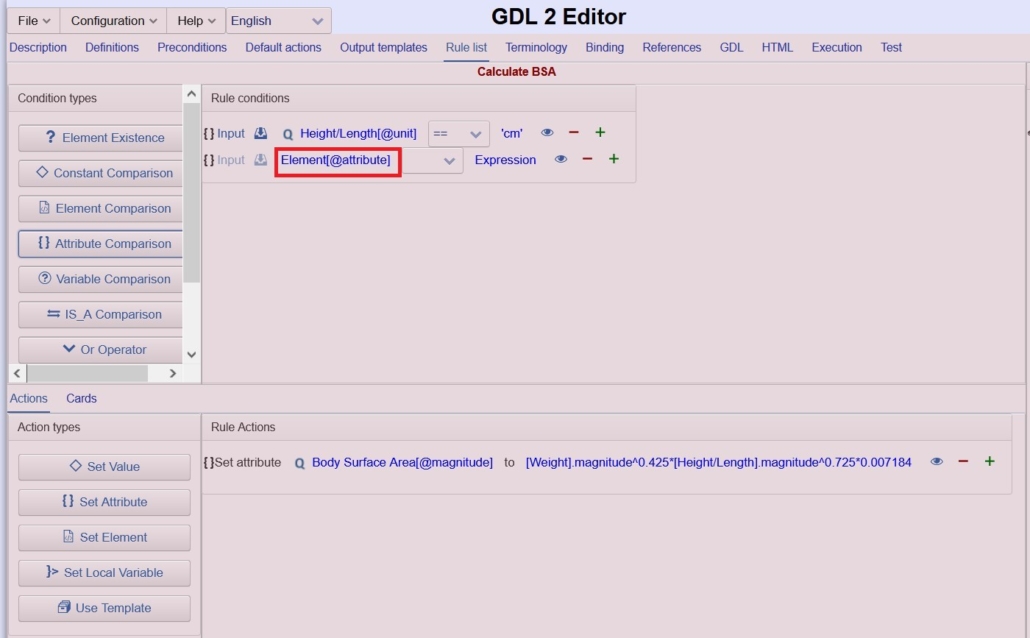
- Now, you should repeat the previous steps with weight as well.
- First, create an empty condition by dragging the Attribute comparison button to the Rule conditions field.
- After dragging the Attribute comparison button to the Rule conditions field click on the Element@attribute label.
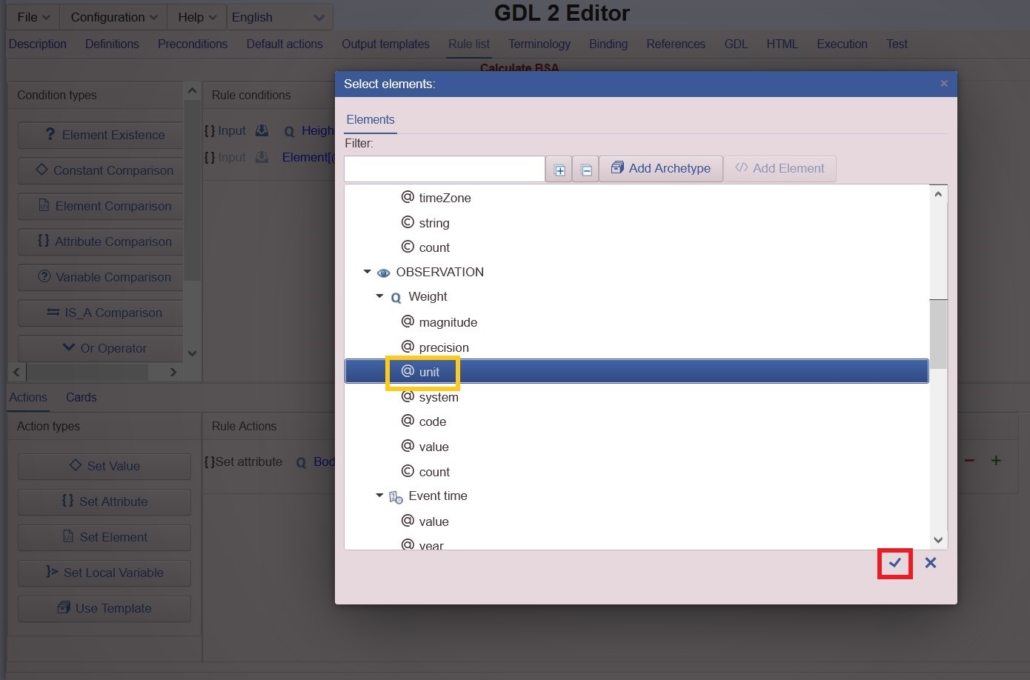
- In the dialog box select the @unit element (yellow box) below Weight and click on the checkmark to confirm your selection. Pay attention not to mix with the other @unit element (corresponding to Height/Length) in the dialog box.
- The dialog box will disappear, and now you will see the unit of Weight in the new condition. Since you want the unit to be equal to kg select the == operator from the drop-down list in the row.
- Click on the Expression label in the row.
- Choose the required unit in the drop-down list. Here we chose kg as the required unit.
- To finalize your selection click on the checkmark in the dialog box. If you completed the steps correctly you should the second rule as it is displayed inside the red box.
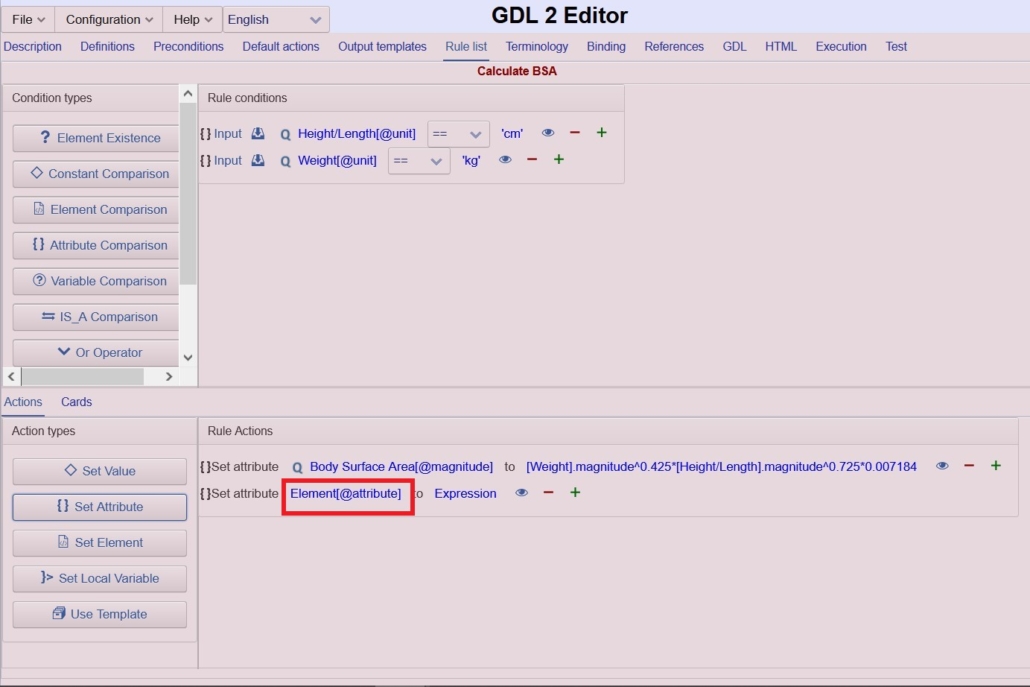
5. Create two actions: one that sets the output’s unit to m2 and one that sets its precision to 2
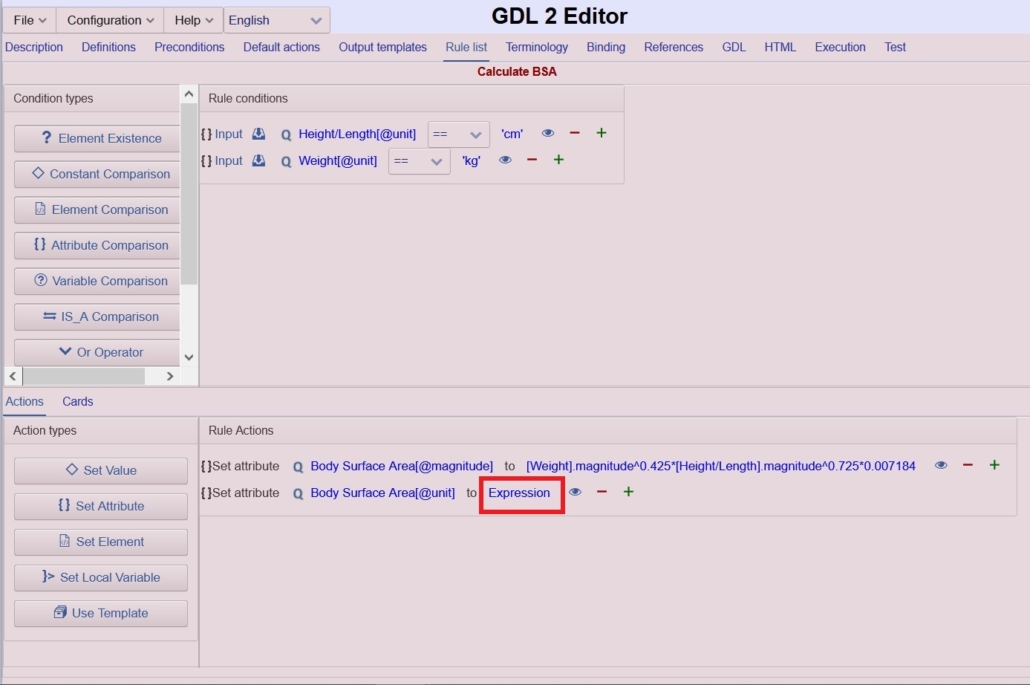
- To start to define the output’s unit, drag the Set Attribute button (to the Rule Action field where you can already see the BSA formula). You will create a new action setting the unit attribute to m2
- In the empty action click on the Element@attribute label.
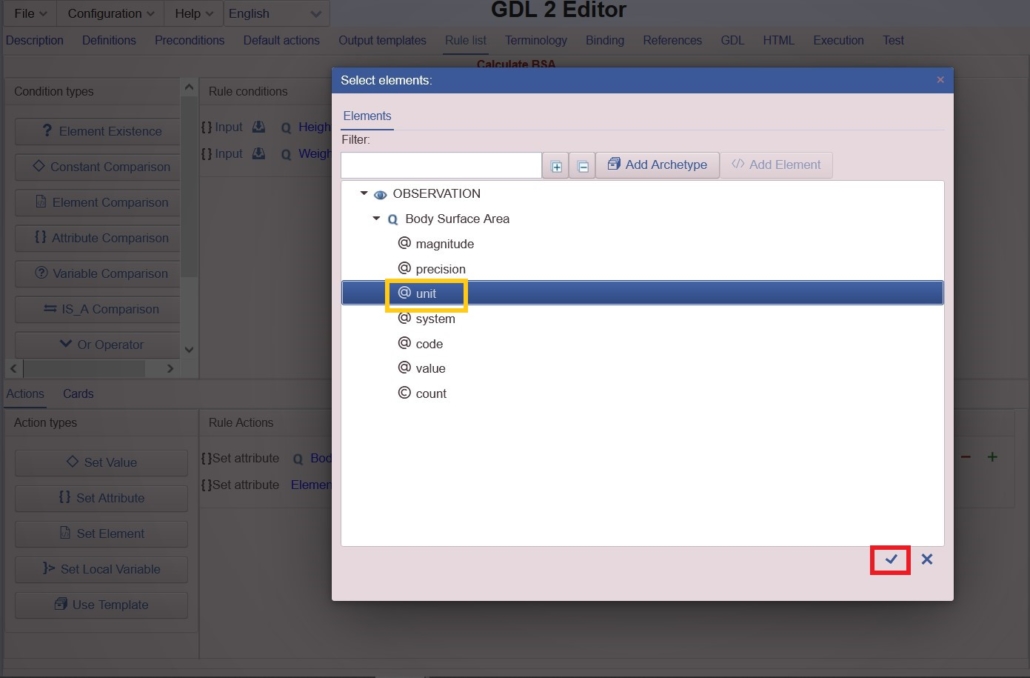
- To select the unit attribute click on the @unit attribute below the Body Surface Area archetype. To confirm your selection click on the checkmark.
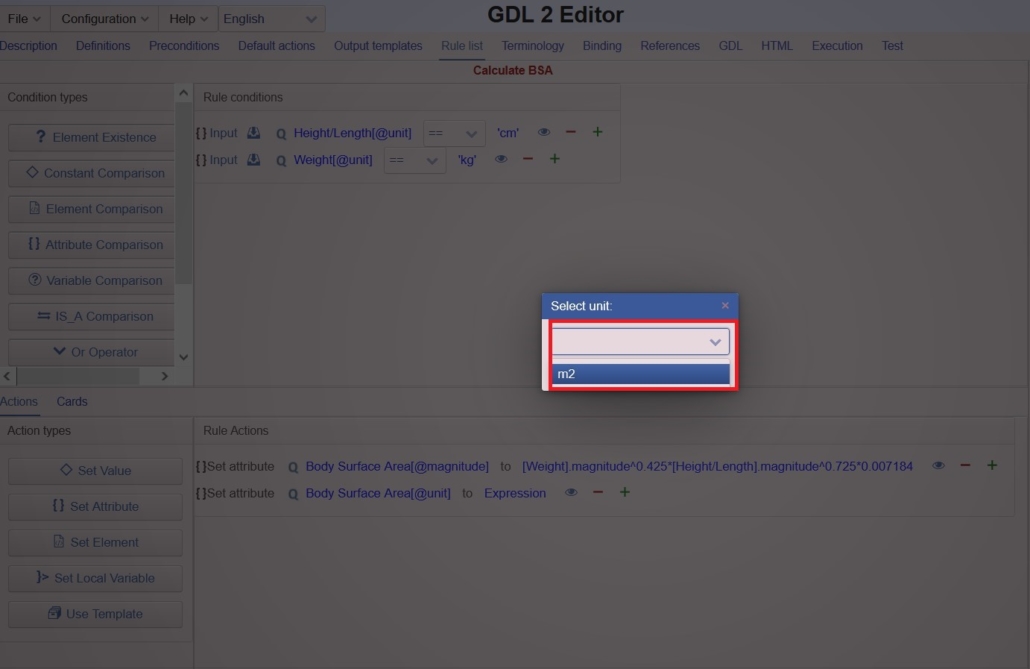
- The dialog box will disappear. Click on the Expression label to open a dialog box to choose the unit of the output.
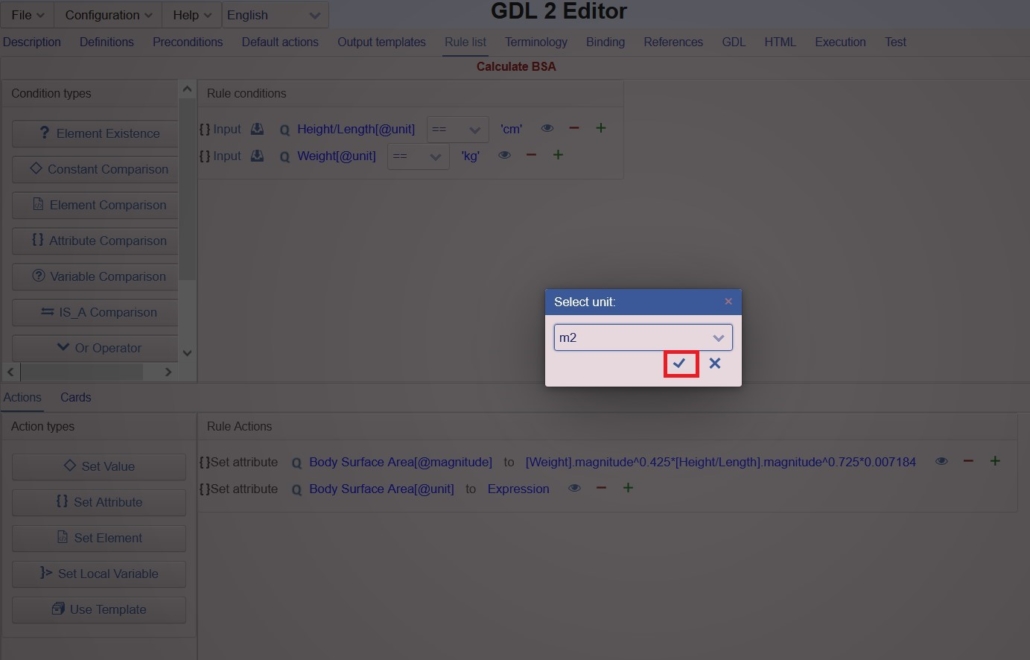
- In the dialog box choose the unit of the output to select the desired unit (m2) in the drop-down list.
- To finalize your selection click on the checkmark.
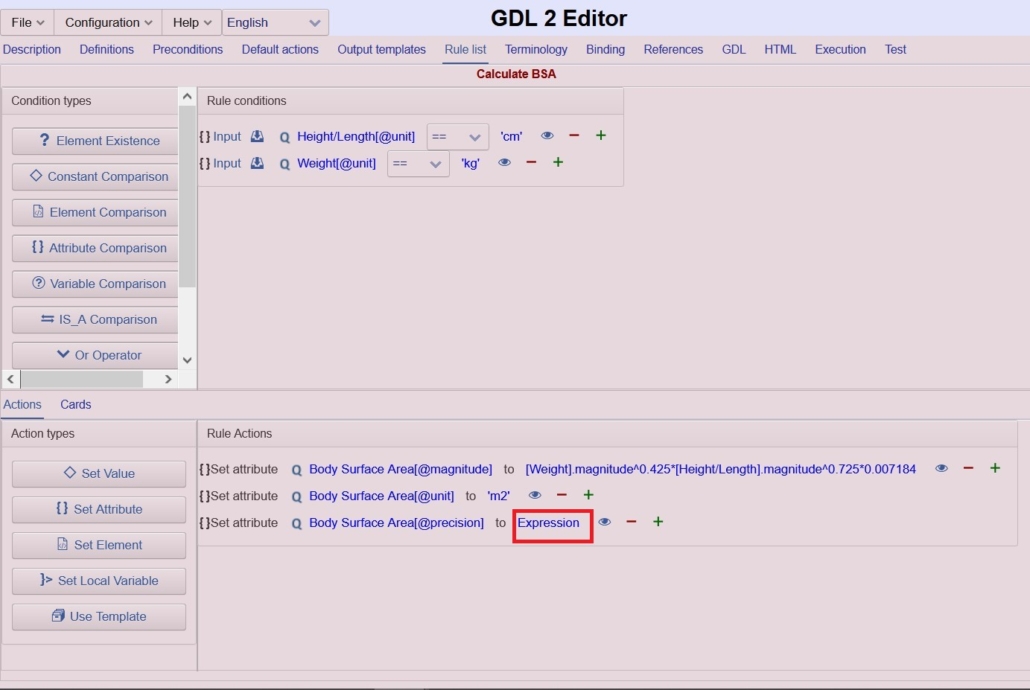
- To start to define the output’s precision, drag the Set Attribute button (to the Rule Action field where you already have your two actions). You will create a new action setting the precision attribute to 2.
- In the empty action click on the Element@attribute label. This will open a dialog box to select the attribute to compare.
- In the dialog box select the precision attribute click on the @precision attribute below the Body Surface Area archetype. To confirm your selection click on the checkmark (red box).
- After selecting precision as the attribute to be defined, click on the Expression label.
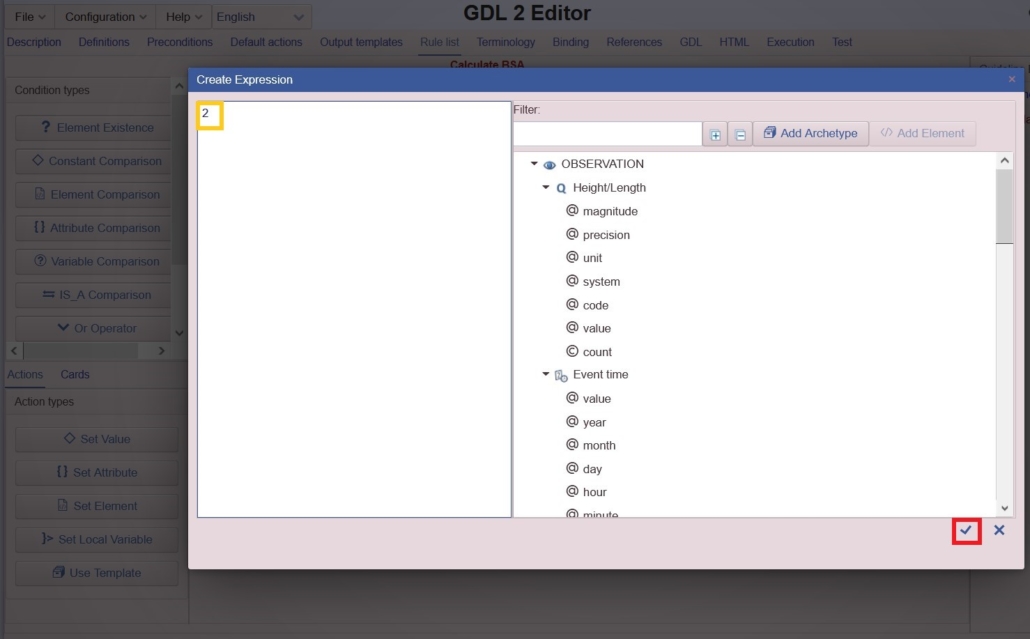
- To set the precision of the output enter 2 in the Expression editor, meaning the output will contain 2 decimals. To accept your selection, click on the checkmark.


6. Check your guideline in the Execution tab.
You can similarly check your guideline as in the previous cases. You can try to use different input units. If they are not as they are required, your guideline would not work.
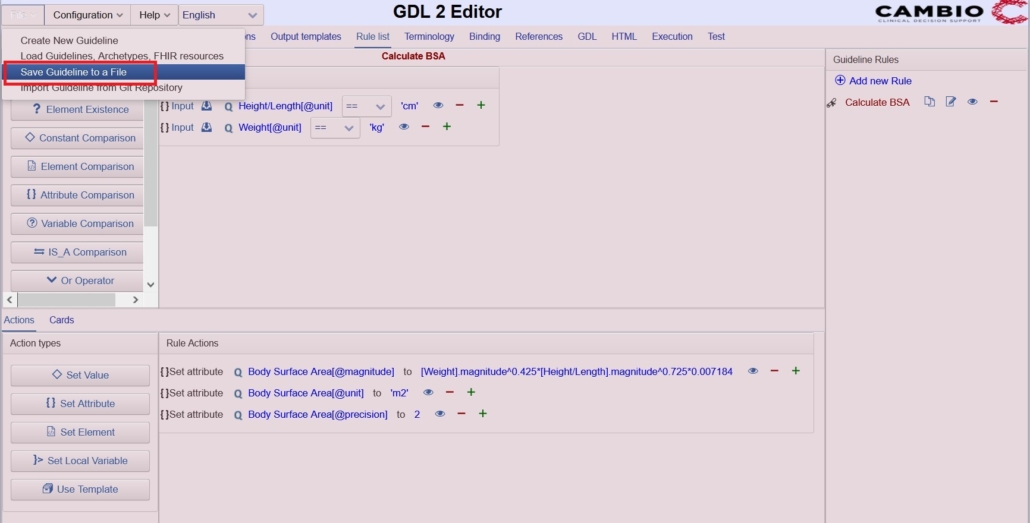
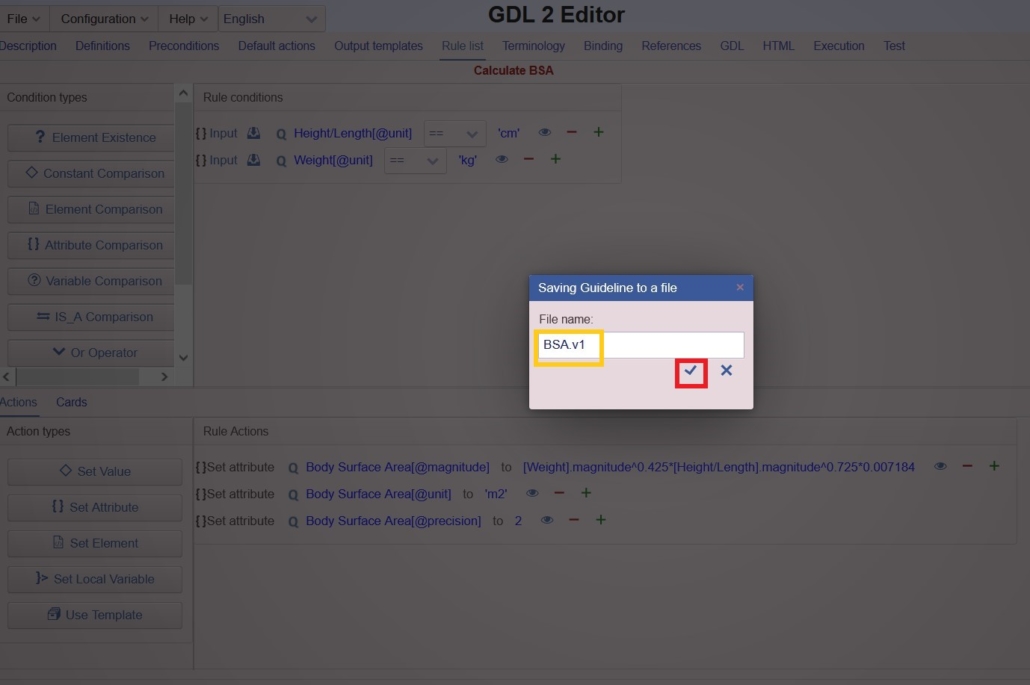
7. Save your guideline naming it as BSA.v1 .
- To save your guideline click on the File > Save Guideline to a File menu item.
- This will show a dialog box to name your file. Write a name to the File Name field, we recommend using BSA.v1 (v1 referring to version 1 compared to the previous version: version 0). To confirm your choice click on the checkmark.
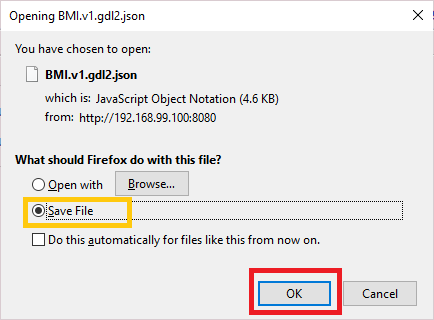
- Depending on your browser configuration your browser might show a dialog box for confirmation. If it shows make sure the Save file is selected, then click on the OK button. The screenshot shows an example where this happened while creating a BMI calculator.
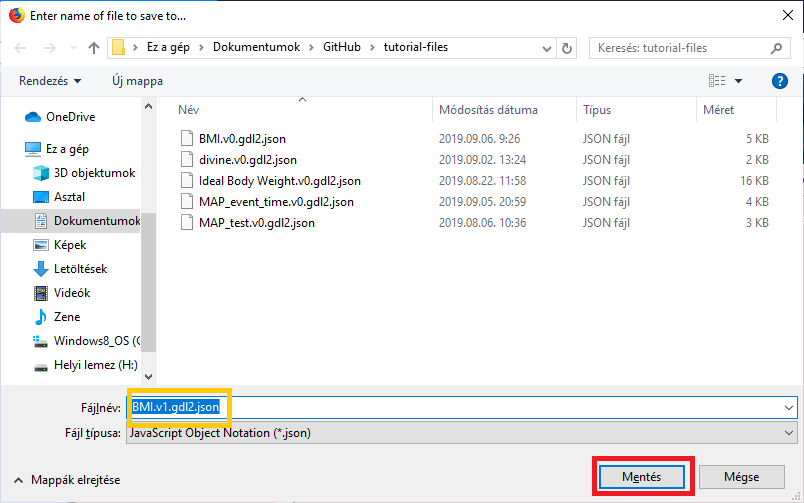
- Depending on your browser configuration your browser might show a dialog box to choose the location of your file to be saved. Make sure the file name is displayed correctly in the File Name field, then click on the Save button in your OS language. The screenshot shows an example where this happened while creating a BMI calculator.